These little eggs are a perfect little addition to your Easter decor, plus so easy and they have WAX SEALS!!
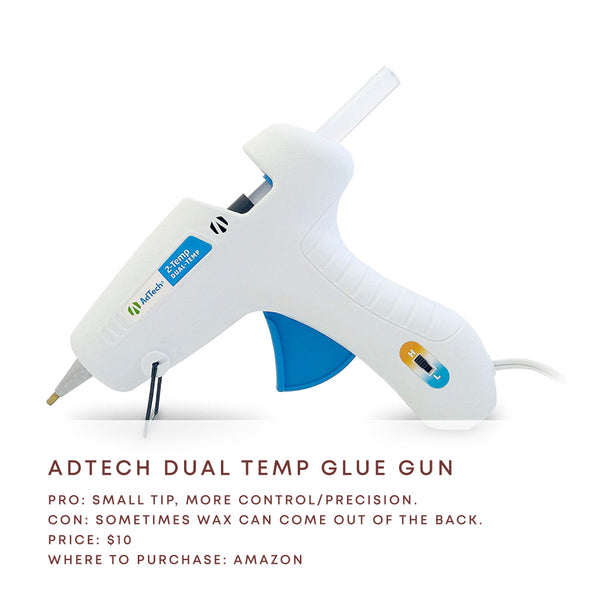
Wooden Craft Eggs | Modge Podge glue | Paint brush | Napkin with printed design | Crystal Clear Hot Glue | Wax Seal Mini Stamps | Low temp glue gun | Krylon Gold Leafing Pen
First remove the bottom layer from your napkin. You’ll only need the top layer. Cut out the portions of the design that you’d like to use. Then use a paintbrush to add some modge podge to the egg. Place the napkin piece and gently press it against the glue. Then add another layer of modge podge to hold it in place. Modge podge will dry clear so don’t worry about it being white right when you put it on.
I did my eggs in sections. So I did one side completely and the did the other side. You can also use a blow dryer on the cool setting to speed up the drying time of the eggs.
Now you’ll want to add the wax seals. First plug in your low-temp glue gun. While it is heating up, place your stamp on an ice pack to start cooling. This is a super important step. If the metal of the stamp is cold, it won’t stick to the glue.
When the glue is warm, pour a small amount onto the egg and press it with the cold wax seal stamp. Allow 30-60 seconds to cool and then remove the stamp from the egg. Repeat this for as many seals as you’d like to add to your egg. If you’d like to add little glue dots to your egg, just do a small pour directly onto the egg and let it cool before tilting or tipping it.
The last step is to color the edge of the seals and the dots with a Kyrlon Gold leafing pen. Make sure to allow it plenty of time to dry before touching it.
That’s it!! It’s a super fun and easy project to make some cute easter decor!
]]>This is one of the most detailed wax seal stamps in the shop! The intricate engravings remind me of hand painted tiles! It's a great stamp to make stand along seals, but it would also be lovely as a base seal with a smaller seal on top! The textural look would be a great for the base of a double wax seal!
Ombre wax seals are super pretty and fun to make! Simply start with your lightest pink and slowly add a little bit more of the darker pink with each pour!
]]>Two pieces of thin, clear plastic
Dried pressed flowers
Krylon Gold Leafing Pen
Crystal Clear Hot Glue
Wax Seal Stamps
Low temp glue gun
Modge podge glue + paint brush
First, trim your re-used plastic into circles. You could make this as small or large as you’d like. Mine is about 4” in diameter. I used lids from takeout containers, so I trimmed off the edge of the lid to give me two flat circles.
Next, get out your dried and pressed flowers! This was one of my favorite parts! I like to lay out the flowers (before gluing) so I know where everything will go. Think about overlapping and using colors that you love! Once you have a layout you like, use modge podge and a small paintbrush to dab small amounts of glue on the back of the flowers. For flowers add the glue to the center of the flower. For leafs, add a little glue on each leaf. Then press the flowers back onto the plastic with the glue side down.
Next, plug in your low-temp glue gun with crystal clear hot glue inside. While it’s warming up, place your wax seal stamps on an icepack so they can start getting cold. If the metal is cold, it won’t stick to the glue! Once the glue is warmed up, place the second plastic circle over the top of the flowers. This will help you know where good places to add the seals would be.
Pour the hot glue into circles onto the plastic circle and press with a wax seal stamp. I used a variety of sizes to create some visual interest and I did a few blank stamps too. Allow the glue to cool for 30-60 seconds. Then remove the seals. You can then use the Krylon Gold leafing pen to color over all the of edges of the seals and the raised designed portion. Let the ink dry for at least 20 minutes before handling.
Now we need to start assembling the two pieces together. Put the two plastic pieces together and make sure the pressed flowers are on the inside and the seals are on the top. Using hot glue go around the edge of the two circles with a thin amount of glue to keep them together. I did this in small sections and held it up while it dries. Once it is all dry, use the Krylon Gold Leafing Pen to color of the entire rim of the circles. Let the ink dry for at least 20 more minutes before handling.
The last step is to punch two holes in the plastic and use some twine, ribbon or string to create a small loop to hang your sun catcher! That’s it! It’s easy, but turns out so so fun! I could see this being used as a sun catcher, an ornament or even as an embellishment to a gift! Let me know if you try it!!
]]>Blank wax seal stamp
Sealing wax beads (I’m using the purple and yellow from this set)
White sealing wax sticks
Wax Seal Warmer
Wax Seal Spoon
Parchment paper
Ink Pen
Craft Paper
Glue dots
First melt the sealing wax. I didn’t have any gray beads on hand, so I combined a purple and yellow (complimentary colors) to get a grayish color. It takes several minutes for the wax to fully melt. Once it does, mix the colors together with a toothpick. Then pour two circles of wax onto the parchment paper and press with blank wax seal stamps. I also did this with white sealing wax sticks that I warmed in a low-temp glue gun. Once the seals cool (about 30-60 seconds), remove the stamps and set aside the seals.
Next create little ears: add a small dot of wax and pulling it away quickly at the end. Use scissors to clip off the excess. I also created dots for little bunny tails. Allow 30-60 seconds for these items to cool and them move them aside.
Then, use super glue or more sealing wax to attach the ears and bunny tail. The super glue worked, but took a while to dry. Next time I think I would just use a dot of sealing wax to adhere them. The last step is to use an ink pen to add in the eyes and nose. Make sure to give it plenty of time to dry so that it doesn’t get smeared.
I also made a fun envelope out of a square piece of paper in this tutorial, so watch until the end to see how to do that as well. They would make super cute little easter cards or a fun addition to an easter basket.
Let me know if you try it! Be sure to like this video and subscribe to see the more wax seal tutorials! If you try this technique, tag me @bgoods.lettering on social (IG, FB, TikTok, Pinterest, etc.)!
If you love wax seals, join The Wax Seal Club! It’s an every-other month subscription with a unique wax stamp and sealing wax! Join the waitlist here.
]]>
Pro: I have a handful of these and I love them. I haven’t had any issues with them.
Price: $10
Where to purchase (Walmart): https://www.walmart.com/ip/Surebonder-Full-Size-Dual-Temperature-Hot-Melt-Glue-Gun/870381
Pro: Cordless, easier to transport and work with anywhere
Price: 17.99
Where to purchase (Michaels): https://www.michaels.com/product/dual-temp-full-size-cordless-hot-glue-gun-D589985S
Pro: I love the color.
Con: The stand isn’t as stable as other glue guns.
Price: $15
Where to purchase (B Goods Lettering): https://bgoodslettering.com/collections/accessories/products/low-temperature-sealing-wax-gun
Pro: I love that the tip is a bit smaller than others, it gives a bit more control/precision.
Con: If you try to to squeeze too much wax out at a time, the wax will start coming out of the back. This tends to happen if trying to rush the wax before it’s fully melted.
Price: $10
Where to purchase (Amazon): https://www.amazon.com/AdTech-0453-2-Temp-Temperature-White/dp/B001689XCQ?th=1
Pro: Cordless, easier to transport and work with anywhere
Con: Feels a bit heavy with the battery.
Price: $39.97
Where to purchase (Home Depot): https://www.homedepot.com/p/RYOBI-ONE-18V-Cordless-Dual-Temperature-Glue-Gun-Tool-Only-P307/315309751#overlay
]]>
Tip 1: Figure out what you love and who you want to serve. There are a lot of different business routes you can take with lettering. But you have to know what you love doing. Do you love doing custom work? Do you love creating something once and selling it over and over? Do you love wedding calligraphy? Do you love doing lettering for other businesses? Take time to experiment and explore what type of lettering you like to do and in what ways. If you don’t like it, don’t offer it as a part of your business. The second part of this is to think about who you want to serve. Is there a type of person that you want to help with your lettering? Knowing that can help you know who you are targeting in your business.
Tip 2: Just get started. Things don’t have to be perfect. You don’t have to have a full website up. You don’t have to start with tons of products. Just start talking about. Let people know what you’re doing and what you’re offering in your business. I think we waste a lot of time being worried or afraid of will or will not happen, instead of just acting. Choose one thing you can do today to help grow your business.
Tip 3: Be consistent. I think this is a huge part of growing your business. People need to have several interactions with you and your business before they will purchase. You have to built trust with them. Showing up consistently is a great way to do that.
Are you thinking of turning your lettering hobby into a business? I’d love to hear about it!
]]>👉🏼 It has a small and firm brush tip.
Why does this matter?
Because it gives you more control.
When you’re learning lettering, you’re not only learning a new skill you’re also learning how to use a new writing tool. The small and firm tip allows you to have more control over the shapes and letters you’re drawing. And therefore help the learning process be more fun and stress-free.
Want to learn brush lettering? Then get sign up for The Brush Lettering Course. A 21-day online course to help you learn everything you need to know about brush lettering. Sign up here.
]]>I saw this quote last week and really loved having this reminder. It reminded me of imposter syndrome and how so many of us in creative fields (lettering artists I’m looking at you) experience this.
Have you experienced imposter syndrome?? Let me know in the comments 🙋🏻♀️ I know I have in the past and still do at times. Let’s talk about what it is and what you can do to overcome it!
👉🏼 What it is: Imposter Syndrome is a psychological pattern where you doubt all of your accomplishments and have a fear that people will find you out as a “fraud”.
👉🏼 What you can do to overcome it: When I first started this account I didn’t want to call myself a lettering artist because I didn’t feel like I knew what I was doing and I was worried people would figure that out. I’m guessing you’ve felt similarly at some point. But, we’re not frauds. What has helped me to overcome this is just creating and sharing my lettering. Here’s the thing, you can’t wait until you’re 100% confident to start sharing you work. Share it now and your confidence will build as you go and that imposter feeling will start disappearing.
What I’m trying to do to overcome imposter syndrome right now is to reframe my thoughts. Did you know that the only difference between you and someone who doesn’t feel like an imposter are your thoughts? We just have to learn to think the way non-imposters think. For example, instead of saying “This lettering has so many mistakes, I can’t share it with others.” Re-frame it to be, “My work is crafted by hand and any imperfections just add to the beauty and humanness of it. People can relate to art that feels human.” If you want to stop FEELING like an imposter you have to stop THINKING like an imposter.
Lastly, it’s important to get over your doubts and worries and just do the things. Your dreams, your “crazy” ideas, why not try them? See what happens. You never know what might come of them until you try.
Wishing you all a happy Monday!!
]]>👉🏼 Each quarter The Lettering Box will be delivered right to your door. Within each box there will some seasonal lettering and wax seal projects to help you learn and improve your lettering WHILE you create.
👉🏼 Each week you’ll receive step-by-step tutorials with tips and tricks for each project.
👉🏼 Each day you’ll have the opportunity to create something beautiful while you’re learning new skills.
Sound fun?! Get early-access to make sure you get a box!
]]>Traditionally you learn lettering through practice…. And practice and practice 😅 The Lettering Box will help you learn and improve your lettering WHILE you create something beautiful that you can use and share with others!
2. YOU Time
As women, we often put ourselves on the back burner and put everyone else first. The Lettering Box will help you take time to do something YOU want to do. Lettering can be your self-care, your “YOU time”!
3. Community of Creatives
Get access to a community of creatives when you get The Lettering Box. Share your work and watch weekly lettering and wax seal tutorials.
Want to get early-access? Sign up here.
]]>Have you struggled to figure out what lettering product or service to provide? It’s not just me right?! I spent so much time trying to figure it out! Here are some tips that really helped me to narrow my focus and decide the direction I wanted to take my lettering business.
✍🏼 4 tips to figure out what lettering product or service you should sell ✍🏼
First, figure out what you’re passionate about. What makes you feel fulfilled? What lettering techniques do you enjoy? What inspires you? What motivates you? You want your business to be based on something that you love to do.
Second, think about what problem can you solve. All good products and services solve a problem, whether big or small. What problems do I face in my general workflow? What would make my day more enjoyable? The answer to these questions could be a product or service you could provide.
Third, decide who you want to serve. You want to be serving people that you enjoy being around and interacting with. So what type of people do you enjoy surrounding yourself with? What impact do you desire to make on people? Determining who your ideal client is will help you make the sales.
Lastly, experiment and try new things. You may have a few products that you’re really excited about, but don’t sell well. You may have an idea for a service, but once you start diving deep decide it’s not really for you. That’s okay. It’s okay to experiment. Ask yourself, what is one thing that you want to try, but it seems too big or scary? That might be your product or service. Try it out, see where it goes.
I’d love to hear what product/service you provide and how you figured out it was for you. Let me know in the comments👇🏼
]]>I’ve been working on The Lettering Box subscription for months, but I still have little thoughts of fear and doubt sneak into my mind. Sometimes I feel discouraged and like I shouldn’t do it. It’s too hard. I don’t know what I’m doing… blah blah blah.
But when I push past those doubts and work on making my box a reality I feel so excited about it! Lettering is my favorite thing to do, so being able to teach people how to do it in such a creative way really does light up my heart.
So if you’re feeling discouraged or doubting yourself and your business, remember to push past those doubts, keep going and chase the things that light you up!
]]>The traditional way to learn lettering is to practice. And practice and practice 😅 It totally works and is very effective. Heck, that’s how I learned and how I often teach beginners. But what if you could learn while you are creating AND actually use the things you’re creating? Sounds like a bit more fun right?
So I put together my first box. A Valentine’s Lettering Box. Then a Spring Lettering Box. And because you all are amazing, they both sold out! I knew I wanted to make even more boxes!
The Lettering Box will help you learn and improve your lettering WHILE you create something beautiful that you can use and share with others!
Want to get early-access to the box? Sign up here.
]]>I’m going to shifting from offering Dear Mama Prints to Dear Mama Stationary (think cards and postcards). I created Dear Mama prints to help encourage and support postpartum moms. It was the first product I offered in my business. I love the prints, but I also really love being able to send that encouragement to new moms via cards and postcards!
So if you’re wanting to give some love to a postpartum mom, send a Dear Mama card or postcard!
]]>
But the last few days leading up to a workshop used to feel really overwhelming. Now I do these three things BEFORE my workshops to help make the preparation stress free.
1️⃣ Prepare the supply kits well in advance. There’s nothing like not having enough supplies to stress you out 🤪 I always start gathering and order my supplies about 3 months before my workshops. That way I have plenty of time to get supplies and even test new ones I may want to use.
2️⃣ Practice teaching! This has been so helpful for me!! I practice teaching my workshop 2-3 times before the real thing. I just sit at my kitchen table and pretend I’m teaching a workshop, but doing an actual practice workshop with people would be even better! This helps me finalize the topic order, figure out how to explain difficult concepts and gives me a basic timeline to base my workshop on.
3️⃣ One of the most stressful parts about preparing of a workshop is wondering if you’ll actually be able to sell tickets! In the months prior to my workshop I keep a list of all the people who have asked about or shown interest in my workshops. Then when I’m ready to sell, I message them and just let them know I have a new workshop available. I’ve been able to have several people attend my workshops by doing this.
There you have it. I hope these three things help take some of the stress out of your workshops prep!
I’m planning on creating a resource to help you run your first workshop! But want to know what format would be best? Mini-course? PDF blueprint, video tutorial? Let me know what format you’d like to see 👇🏼👇🏼👇🏼
]]>
1. It adds another revenue stream to your business
Adding workshops to your business model can add another stream of revenue. Not only is it nice to have the extra income, but it can help prepare you in case other areas of your business aren’t doing well.
2. People are craving connection and experiences
Now more than ever people are craving connection and experiences. After a full-year + of lockdowns people are ready to connect and interact.
3. It can result in future opportunities
Teaching workshops can lead to many future business opportunities. I was able to teach a private workshop with an organization here in SLC, just because they saw a post I did about another workshop. You also meet some amazing people in each an every workshop and if those people have good experiences, they want to keep learning more from you.
If you’re thinking about teaching workshops, you should do it. There’s so much good it can bring to you and your business!
I’d love to hear if you’re thinking about teaching a workshop! Let me know in the comments!
]]>When I started my business I had NO IDEA what an ideal client was. To be honest, I didn’t think it would be very important when I first learned what it was. But once I actually sat down and figured it out, it was so helpful to me.
✨ So let’s talk about your ideal client ✨
👉🏼 What is an ideal client? This is your perfect customer. This is someone who needs and wants exactly what you and your business offers.
👉🏼 Why is it important to know who your ideal client is? Knowing and understanding your ideal client will help you know what they NEED and WANT as well as how to TALK and SELL to them.
👉🏼 How do you determine your Ideal Client? You can think of an existing customer that you have loved working with or you can just dream up the perfect client. You basically want to know everything you can about who they are, what they like and dislike, what are their problems and how can you help provide a solution to their problems.
If you’re just learning about what an ideal client is or maybe yours needs a bit of a refresh (like mine did), then this FREE worksheet is for you!!
In this free worksheet I’ll walk you through three steps to discover your ideal client.
👉🏼 Step 1: Who is your ideal client
👉🏼 Step 2: What are their pain points and problems
👉🏼 Step 3: What do you offer that can provide a solution
👉🏼 And lastly, how to actually start using that information to help your business.
Ready to get started? Get your FREE Worksheet here.
]]>Three reasons learning Adobe Illustrator is a smart move as an artist and as a business owner.
1️⃣ Creating your lettering in a vector format will allow you to scale your lettering as large or as small as you want without loosing quality.
2️⃣ Having vector versions of your lettering allows you to mass produce your work. Instead of doing each lettering piece by hand, you can do it once and them duplicate it instantly.
3️⃣ Illustrator is the industry standard. If you want to start licensing your lettering or collaborating with big brands you need to be able to use the same software that the rest of the industry is using.
I’ll be sharing Adobe Illustrator tips each week to help you grow as an artist and business owner. I’ve been using Illustrator for 15+ years as a designer and it is hands down my favorite Adobe program! I’m excited to share the things I love about Illustrator with all of you as well as share some tried and true tips that will make your creative process easier as a lettering artist!
]]>
Before school started one of our cousins was coming over a few times a week to play with the kids so I could focus on work for a few hours.
On one of those days I was feeling stressed out about work and life. While I was making lunch for all of us, he started asking me questions. Like my least favorite food, how I met my husband, if I had siblings. That little conversation shifted my perspective of the day. I felt better.
Later I was thinking about the quote by Spencer W Kimball, “God does notice us, and he watches over us. But it is usually through another person that he meets our needs.” This was a small experience where I felt the love of God.
Remember you are loved. Look for the experiences and people who let you know that He loves you. Because he does 💛
Don't forget to Pin it ^
]]>
After I had my second baby, my sister would send me a text about every week and just ask how I was doing. It was such a small thing, but it really helped me. It helped me to feel loved, to feel remembered and like I wasn’t going though this motherhood journey alone.
You can do the same thing for moms that you know who are struggling. It can be as simple as sending a text or something even more meaningful like a postcard.
Dear Mama postcards have hand-lettered art on the front with space to write your personalized message on the back. Buy a single postcard or a set of 3 for a reduced price. Let me help you choose the perfect postcard 💛
Don't forget to Pin it ^
Want to see more Dear Mama Products? Check out our cards and prints!
]]>At the beginning of the year, I joined a lettering challenge. Everyday for one month we practiced the basic strokes. For a whole month guys! I will admit, by the end I was ready to be done.
But you know what happened! My lettering improved so much. Because I spent that time re-learning the basic strokes and really getting them built into my muscle memory. Because the basic strokes make up all lowercase letters, spending time working on the basic strokes WILL improve your lettering.
If you want to get back to the basics and practice your basic strokes again, then you need to get my FREE Brush Lettering Basic Strokes Guide!
What’s included in the guide:
1. My recommended supplies list for beginning and intermediate lettering artists
2. Tips for working with your brush pen
3. A walkthrough of all 10 basic strokes with practice sheets to start building your muscle memory
It’s totally something I wish I had when I first started and something that helped me even being past the beginner stage in lettering!
Get the guide here!
Don't forget to Pin it ^
]]>What is an ideal client?
This is your perfect customer. This is someone who needs and wants exactly what you and your business offers.
Why is it important to know who your ideal client is?
Knowing and understanding your ideal client will help you know what they NEED and WANT as well as how to TALK and SELL to them.
How do you determine your Ideal Client?
There are a few ways:
Then answer these questions:
Knowing these things makes it easier to create products that will actually meet your idea clients needs or solve a problem for them.
Here's my ideal client so that you can see an example.
Tayler is 32. Married to her best friend and has 3 little ones (4, 2, 1 month). She is experiencing postpartum anxiety and depression and is seeking help to improve her maternal mental health through a therapist and positive thinking. She works full-time as a designer, but wants to transition to working as a freelancer so she can be home with her babies more (even though she’s not always in love with being a mom.) Her hobbies include: baking, lettering and being outside and she is always trying to make more time for them. She needs encouragement and support as a mom. She feels exhausted, worried and that her efforts are never enough. Sometimes she feels alone and like no one can relate to her or her situation. Even though she feels all those emotions, those who know her would say how loving, kind and happy she is. She loves her family and loves God.
I know it seems like knowing who your ideal client is may not be an important part of your business, but it is. It will help you know who you are serving, who you are talking to and who you are selling to.
Let me know in the comments if you know who your ideal client is.
Don't forget to Pin it ^
Need help planning your Instagram posts to meet the needs of your Ideal Client? Then I have the perfect guide for you! Get it here.
]]>[Insert Video]
3 Tips for Drawing the perfect O Form
1. Imagine the O form is a clock. When you start drawing you want to start at the 2 o’clock position. This will allow you to have enough space to transition from light to heavy pressure.
2. Start the transition from heavy to light pressure at about the 7 or 8 o’clock position. Doing this will allow you to have a smooth transition on the bottom of the O Form.
3. Lastly, it can be hard to end your O Form in the exact spot that you started. To help you, keep your eye on the starting point as you draw from the 7 o’clock position and finish the O Form. Your hand will follow where your eye is fixed.
Don't forget to Pin it ^
Did you find these tips helpful? Then you’ve got to sign up for my upcoming lettering course! Sign up now!
]]>For me, I believe God has given us moms an extra awareness (aka intuition) and gives us additional guidance so we can best help our children.
I was reading an experience that my grandma had written and it just reinforced to me that mothers intuition is real and always has been. Here’s the story taken from her journal entry written February 4, 1988.
“When I took Betty down to the Dr. for her six week check-up, he told me she had a murmur in her heart and when she got about five years old, we should take her and have it checked out. But the Dr. would not do anything about it before then as she was too little.
One day when she was about 18 months old, I was playing with her and put her up in the kitchen window and had her jump into my arms. As I put her into the window, I put my ear to her little heart and it sounded so funny. When Dad and Charles came home I had them listen and we decided we better have it checked.
We called a Dr. we had been friends with in Rapid City and asked him to get us an appointment with a heart Dr. He did and we took her right down to Utah and had her checked out. It was at the University of Utah Hospital. They had all these young students that were studying to be doctors all around that poor little girl. The main Dr. told us he would not want to send her home all the way to South Dakota without taking care of it; as she was in really good health now and if she had an attack it would weaken her.
So we did not even take her out of the hospital. They operated on her, what a long ordeal that was, but she came out of it just fine and we took her home in a week. We had to take her down every year for a check up till she was about 7 years old and then he released her and said she was just fine. What a blessing that was and [I] know it was through the Spirit of the Lord that we took her when we did.”
I’d love to hear your experiences with mothers intuition, whether big or small. Comment below.
Don't forget to Pin it ^
Do you know a mama who needs to be reminded to follow her intuition?
Send her some Dear Mama Prints. Hand-lettered, faith-based art and encouragement for postpartum mamas.
]]>I just love this scripture. It’s been on my mind for the past several months. Really it’s just a reminder to me to remember the Lord. To remember to stay close to him. He is our strength.
Don't forget to Pin it ^
]]>So what do do instead? Make a ta-da list. This is an amazing idea from @drjuliehanks (If you’re not following her, you need to. She has the best advice and thoughts for women and moms).
At the end of your day instead of looking at all the things you didn’t do, make a ta-da list of all the things you DID do. You’ll be surprised with all of your successes and it feels good to acknowledge all you’ve done. Check out one of my ta-da lists below.
Have you ever tried a ta-da list? Do you think you’ll try it?
Don't forget to Pin it ^
]]>Hold your pen at a 45° angle.
[Insert Video]
Holding your pen at a 45° angle allows you to get BOTH thin and thick lines. Any other angle doesn’t allow you to get the same flexibility. Check out the video to see how it works.
Did you find this tip helpful? Then girl, you need to sign up for my upcoming lettering course that is releasing soon! Head here to sign up!
Don't forget to Pin it ^
Want to learn Brush Lettering? Then this is for you!
In this free guide you will learn the Basic Strokes which are the foundation of drawing letters! Sign up to get your free workbook and start learning now!
]]>As I was cleaning a song came into my mind:
“Where can I turn for peace?
Where is my solace
When other sources cease to make me whole?...
Gentle the peace he finds for my beseeching.
Constant he is and kind,
Love without end.”
The phrase “Constant he is and kind, love without end.” Stood out in my mind. This led to two thoughts:
1️⃣ As a child my parents always took me to church and a big part of church was the music. Over years of attending I’ve learned many different hymns. I hadn’t heard or thought of this particular song in who knows how long. It is amazing to me that the spirit can bring things from the past our remembrance, in moments when when we really need them.
2️⃣ Jesus Christ has and continues to be a constant for me. He is always right next to me. Sometimes I wander from Him. But he never moves. He’s always there.
Whoever needs to hear this: He is kind. He is constant and He is always there.
Don't forget to Pin it ^
Want to learn brush lettering? Check out my FREE Basic Strokes Workbook! Get it here.
]]>