How to make a wax seal sun catcher with pressed flowers
Obsessed. That is all I have to say! This would be so cute as a little sun catcher, an ornament or even a gift embellishment!
Watch the full YouTube tutorial here:
Supplies you'll need:
Two pieces of thin, clear plastic
Dried pressed flowers
Krylon Gold Leafing Pen
Crystal Clear Hot Glue
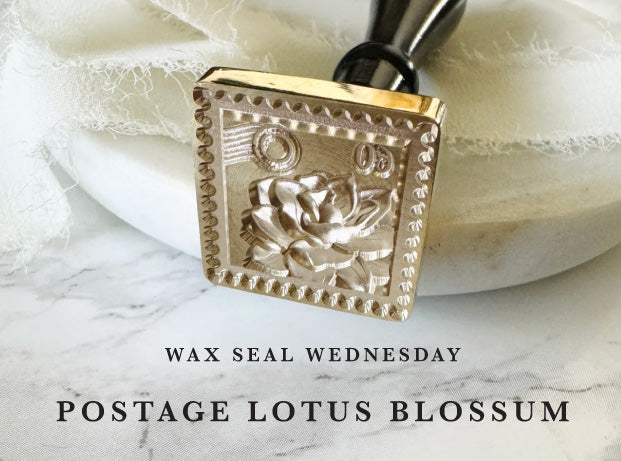
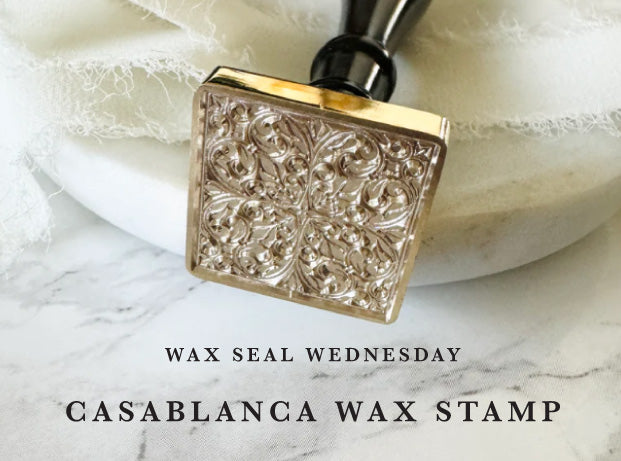
Wax Seal Stamps
Low temp glue gun
Modge podge glue + paint brush
How to make them:
First, trim your re-used plastic into circles. You could make this as small or large as you’d like. Mine is about 4” in diameter. I used lids from takeout containers, so I trimmed off the edge of the lid to give me two flat circles.
Next, get out your dried and pressed flowers! This was one of my favorite parts! I like to lay out the flowers (before gluing) so I know where everything will go. Think about overlapping and using colors that you love! Once you have a layout you like, use modge podge and a small paintbrush to dab small amounts of glue on the back of the flowers. For flowers add the glue to the center of the flower. For leafs, add a little glue on each leaf. Then press the flowers back onto the plastic with the glue side down.
Next, plug in your low-temp glue gun with crystal clear hot glue inside. While it’s warming up, place your wax seal stamps on an icepack so they can start getting cold. If the metal is cold, it won’t stick to the glue! Once the glue is warmed up, place the second plastic circle over the top of the flowers. This will help you know where good places to add the seals would be.
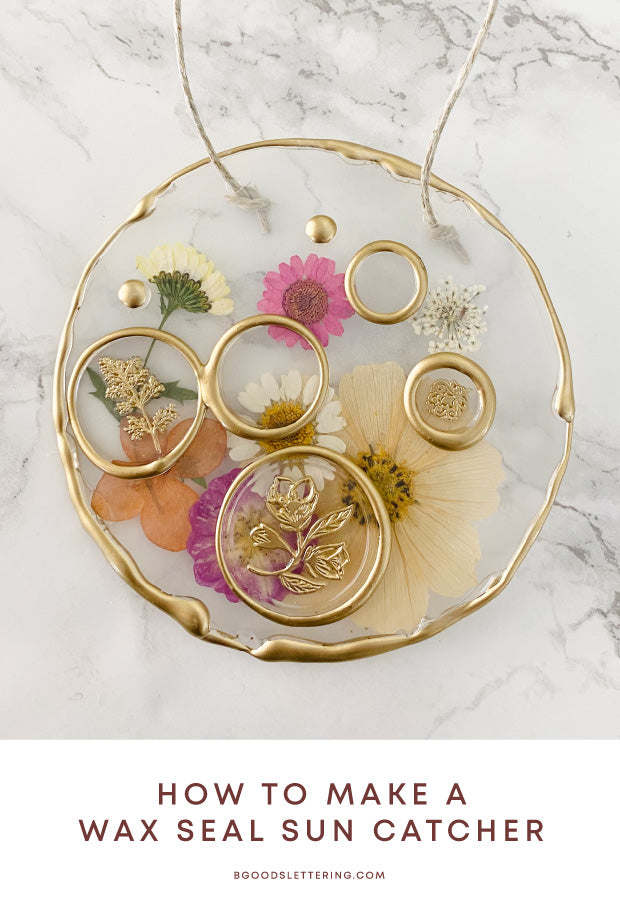
Pour the hot glue into circles onto the plastic circle and press with a wax seal stamp. I used a variety of sizes to create some visual interest and I did a few blank stamps too. Allow the glue to cool for 30-60 seconds. Then remove the seals. You can then use the Krylon Gold leafing pen to color over all the of edges of the seals and the raised designed portion. Let the ink dry for at least 20 minutes before handling.
Now we need to start assembling the two pieces together. Put the two plastic pieces together and make sure the pressed flowers are on the inside and the seals are on the top. Using hot glue go around the edge of the two circles with a thin amount of glue to keep them together. I did this in small sections and held it up while it dries. Once it is all dry, use the Krylon Gold Leafing Pen to color of the entire rim of the circles. Let the ink dry for at least 20 more minutes before handling.
The last step is to punch two holes in the plastic and use some twine, ribbon or string to create a small loop to hang your sun catcher! That’s it! It’s easy, but turns out so so fun! I could see this being used as a sun catcher, an ornament or even as an embellishment to a gift! Let me know if you try it!!
Leave a comment
This site is protected by hCaptcha and the hCaptcha Privacy Policy and Terms of Service apply.